8 DIY Fall Craft Décor Ideas Featuring Gourds
By Chris Edmunds
Looking for something to do this fall? Read about our top 8 DIY gourd décor ideas.
Looking for something in particular?
Search our article library:
Need some advice on how to start a beautiful garden? Sign up for our email newsletter, and receive free gardening articles, resources, and container designs to your inbox.

It’s easy to give off some serious fall vibes with these fun DIY crafts, and the best part is that gourds and pumpkins are relatively inexpensive décor items. If you haven’t grown your own gourds they will be readily available at your local grocery store, where you’ll be able to find them of varying shapes and sizes—perfect for these easy crafts!
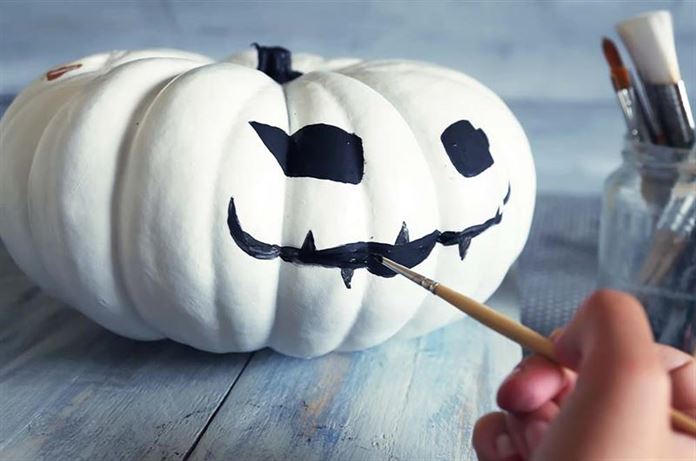
1.Painted Pumpkin Crafts
A cute and easy way to decorate for fall is to simply paint your pumpkins! For the best results, use either acrylic paint or spray paint because they’re less likely to crack after they dry.
Step 1: Wash
First, you’ll want to wash your pumpkin using a bleach and water solution. This will remove any dirt or bacteria from the outer skin.
Step 2: Prime
Next, for the best results, use a primer so that the surface of the pumpkin is sealed (a water-resistant paint primer will work best). Once you’ve applied the primer and it has dried, the paint will have a nice clean and sealed surface to stick to.
Step 3: Paint
Finally, you can get to the fun part—painting! Whether you want to keep it simple by painting your entire pumpkin in an elegant, metallic rose gold or go crazy with some cool patterns like chevrons or even a mandala. The choice is yours!
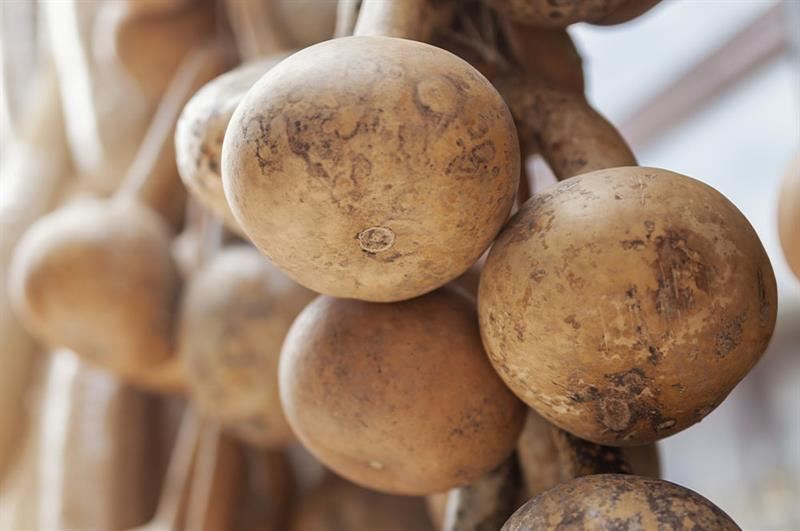
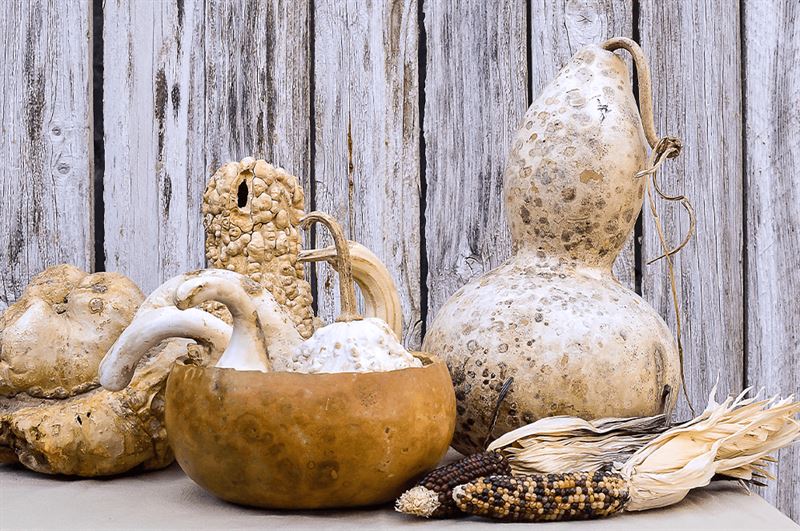 2. Hang Dried Gourds
Depending on the size of your gourds, the drying process can take between one to six months, so, while easy, this is a craft you’ll want to plan a bit in advance! If you don’t want to wait for your gourds to dry for six months, craft stores may carry them in the fall, or you can try shopping online. Otherwise, read on to learn how to dry your own gourds.
How to Dry Gourds
The key to drying gourds is to provide them with enough air circulation so that they don’t mold. Lightly wrap your gourds in newspaper and place them on drying racks in a dark, dry place such as the basement. You’ll know the gourds have dried properly when you pick them up. They will feel light, and the seeds can be heard rattling inside. Now you get to move on to the fun part of decorating them any way you want!
Décor Craft Ideas with Dried Gourds
For a more natural look, simply seal them with a clear primer to help preserve them and show off the gourds’ natural colors. Or feel free to paint them, carve them, or do pretty much anything you want!
Now that your gourds have dried, simply hang them in a way that is attractive to the eye. This could be in bunches hung near a window or as a garland strung across your mantle.
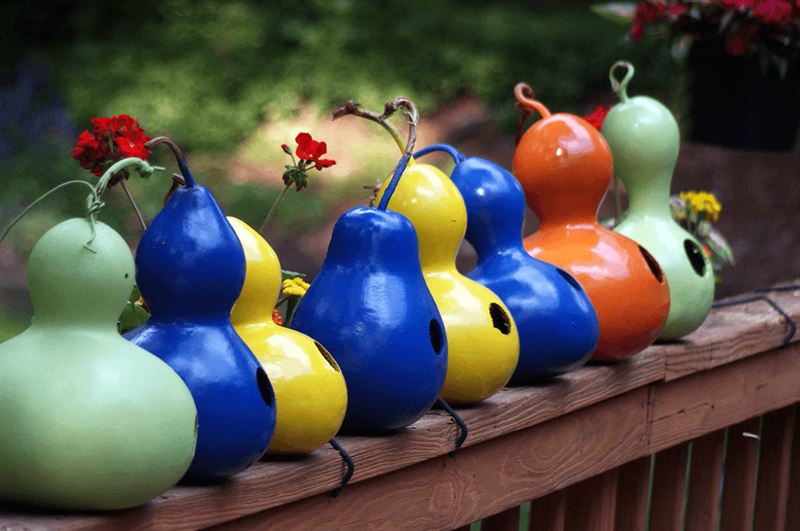 3. Gourd Birdhouses
Making a DIY gourd birdhouse is as fun as it is easy! When choosing a gourd, the size and shape need to be taken into consideration to determine what kind of birds you’ll attract. Typically, dried bottle gourds have the best shape and are versatile enough to accommodate various bird species. Follow our easy step-by-step guide below to create your birdhouse.
Step 1: Clean the Interior
Use a drill to make a 2” hole on one side of the gourd. Then scoop out the seeds and bits of pulp using a spoon or knife.
Step 2: Clean and Sanitize
Use a piece of sandpaper to smooth any rough parts of the exterior—especially around the hole you just drilled. Then fully submerge and soak the gourd in a solution of one part bleach and nine parts water for 20-30 minutes.
Step 3: Prime, Paint, and Seal
Because the birdhouse will be hung outside and exposed to the elements, it’s a good idea to give the paint its best chance by first priming the gourd. This will help the paint stick to the gourd’s surface a little better.
Once the primer is dry, use exterior latex paint for the best results. Finally, once the paint has dried, seal it with a coat of clear polyurethane. It really is as easy as that! Now that your homemade birdhouse is ready, all that’s left to do is hang it in a nice location and watch your feathered neighbors move in.
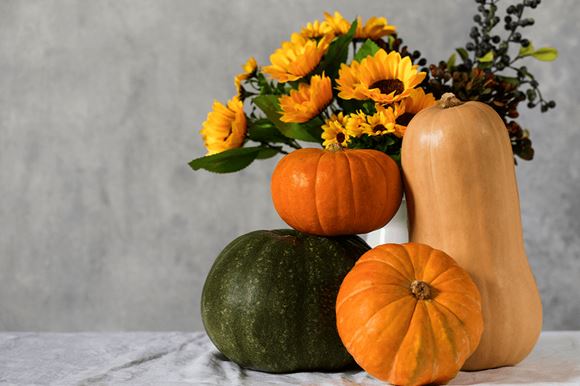
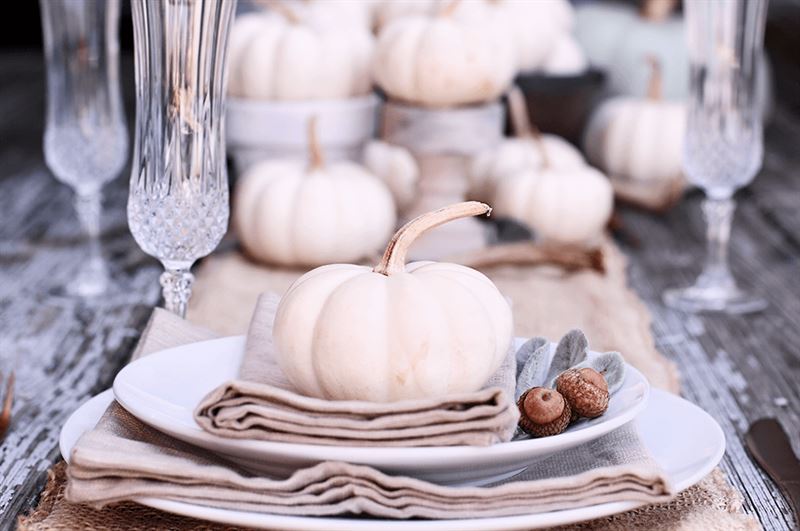 4. Pumpkin and Gourd Table Arrangements
A straightforward yet creative fall décor craft idea is a beautiful table arrangement. This could be for your dining room table, coffee table, or perhaps an entryway table to really set the fall tones in your home.
The nice thing about a table arrangement is that the possibilities are endless! Here are a few examples of our favorite ideas to help get those creative juices flowing.
Vessel Centerpieces – Fill a decorative bowl or modern vase with a variety of small pumpkins and gourds. Easy, efficient, and cute to boot!
Dressed Up Table Runners – You can use a neutral-colored runner, like burlap, for a nice, rustic vibe, or, if that pop of fall color is the look you want, use a red runner. Strategically placed pumpkins and gourds in a nice pattern will really bring the look together.
Green Centerpieces – Skip the runner entirely and go all-natural by nestling your pumpkins and gourds in bushels of greenery!
 5. Gourd Garland Crafts
Creating a DIY gourd garland is a super easy and creative way to add some festive fall feels to your home. We do suggest using small gourds as they will be easiest to string up!
Choose Your Gourds
Select as many small, dried gourds that you wish to use to make your garland. Gourds are naturally unique in shape and size, but for the best look, try to choose ones that are all of similar sizes.
Choose Your Stringing Material
You can choose twine, fishing line, jute, or even yarn to string your gourds.
Decide How to String Your Gourds
There are two different ways you can string your gourds. The first is by taking a small drill bit and drilling holes on either side near the top of the gourd, and snaking the string through the holes. It’s a good idea to tie a knot on either side of the gourds to hold them in place securely. If you don’t want to damage your gourds, then you can simply wrap your string tightly around the tops of your gourds and hang them that way!
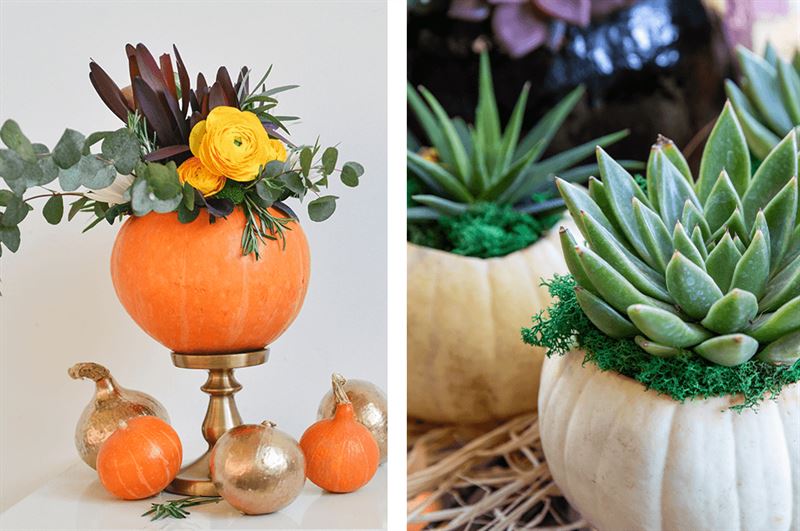 6. Gourd Flower Vases
Perhaps you have a special dinner planned and want to decorate your table with a nice bouquet of flowers, but a regular ol’ vase just won’t do. Consider instead using a gourd or pumpkin as a vase to add a unique pop of fall to the table!
As we’ve mentioned, gourds come in all sorts of unique shapes and sizes, which means you can choose either a tall bottle-shaped gourd or a short, round apple-shaped gourd. It really depends what type of look you’re after for your flower arrangement!
Simply cut the top of the gourd off, scoop out the seeds and pulp, and voila! You have a unique fall-themed vase. Add a gorgeous bouquet to your vase that boasts rich fall colors.
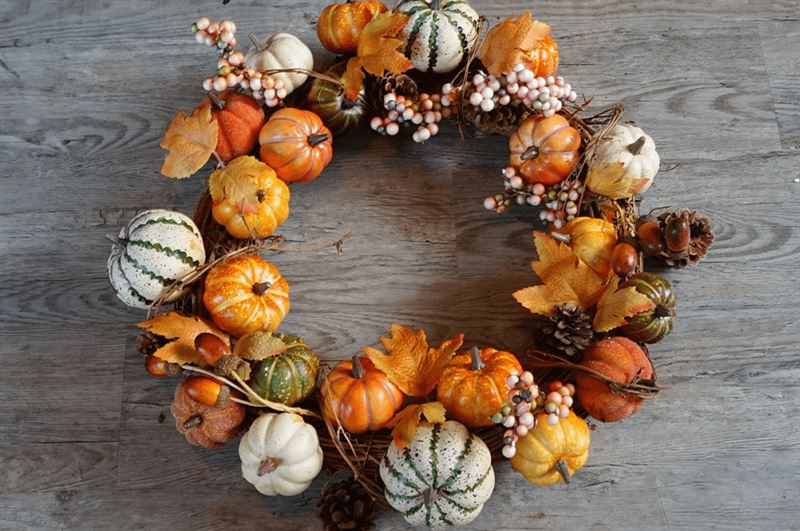 7. Fall-Themed Gourd or Pumpkin Wreaths
Who doesn’t love adding seasonal wreaths to their front door? Especially when they’re this cute and easy to make. You can decorate a wreath using either small gourds or small pumpkins—or maybe a mix of both!
The great thing about wreaths is that you can add any element you want to them. And the only materials you’ll need are a wreath—which you can find at your local craft store—bits of wire, and whatever you choose to use as decorations.
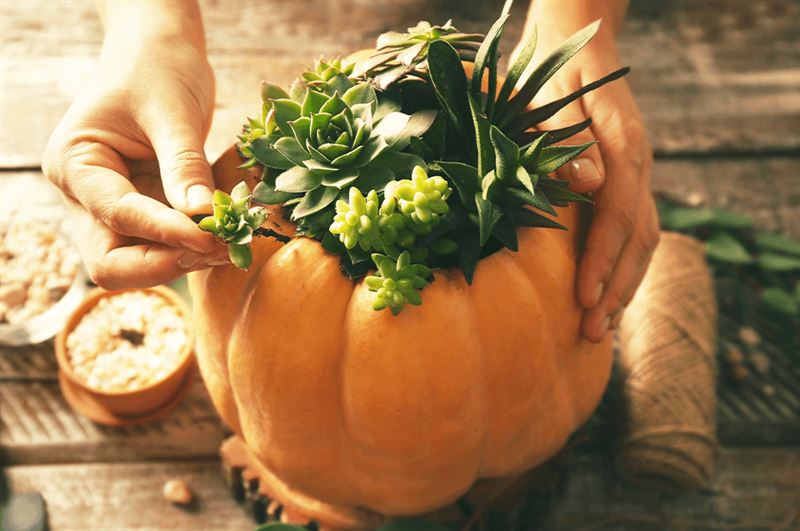 8. Pumpkin Succulent Planters
This is such an unbelievably easy and gorgeous DIY craft, and as a garden center, we, of course, love decorating and crafting with succulents.
Chop off the top of your pumpkin—but don’t bother gutting it! The moisture of the pulp will actually benefit the succulents. Plant your selection of succulents and fill in any holes with soil as you normally would in any other planter.
Place your finished pumpkin planters on your front porch, as a centerpiece on your dining table, or anywhere really!
These are just a few fun and easy crafting ideas, but they are sure to keep you and your family entertained! No matter your style, these versatile craft ideas will allow you to bring your personal flair to your home this fall.